Mastering Wilderness Survival: 10 Essential Apocalyptic Survival Hacks for Any Emergency
Imagine this: One moment you’re enjoying a peaceful hike, the sun on your face and birds singing. The next, a sudden storm rolls in, disorienting you, and you realize you’re completely lost. Your phone is dead, your trusty map is soaked, and the familiar trail has vanished. Panic begins to set in, but then, a flicker of memory from a video you watched earlier comes to mind. You recall a series of ingenious survival hacks – simple, brilliant solutions using everyday items that could just be your lifeline. That moment of clarity, where preparedness meets improvisation, can truly be the difference between a minor setback and a full-blown crisis.
The wilderness, while beautiful, is unpredictable, and emergencies can strike without warning. Whether you’re an avid camper, a casual hiker, or simply someone who believes in being ready for anything – even the ‘end of the world’ as one of our hosts humorously puts it – understanding basic survival skills is invaluable. The video above showcases ten incredibly practical tricks that leverage common items for critical needs like navigation, signaling, and even getting a bite to eat. Let’s delve deeper into these essential emergency survival hacks, offering expanded insights and practical tips for anyone looking to boost their self-reliance in the great outdoors.
1. Improvised Compass: Navigating the Unknown with a Needle and Water
Losing your sense of direction is one of the most frightening situations in the wilderness. While a GPS is ideal, a quick DIY compass can be a true lifesaver. This ingenious hack demonstrates how to harness the Earth’s magnetic field using minimal resources. The key lies in creating a temporary magnet from a simple metal object. Researchers estimate that getting lost is a factor in approximately 10-15% of all outdoor search and rescue operations, highlighting the critical need for navigation tools.
- **The Magnetization Process:** First, take a small piece of straight metal, like a sewing needle or even a thin paperclip. Secondly, use a magnetizable tool, such as the blade of a pocket knife, and run it along the needle 50 to 100 times in the same direction. This repeated motion aligns the electrons within the metal, giving it a slight magnetic charge.
- **Creating the Float:** Next, carefully cut a small circle from a lightweight material like paper, a leaf, or even toilet paper. This float should be large enough to support the needle but small enough to fit within a cup or small puddle of water.
- **Orientation and Context:** Gently place the magnetized needle on the float, then set it on the surface of still water. The needle, now magnetized, will slowly orient itself to point north and south. Because the polarity (which end points north) can vary based on how you magnetized it, observe your surroundings for context clues like the position of the sun, moss on trees, or prevailing wind directions to confirm true north.
2. The Candy Wrapper Whistle: A Call for Help in Compact Form
Signaling for help is paramount when you’re in distress. A whistle’s sharp, piercing sound travels much further and demands more attention than shouting, especially over long distances or through dense foliage. This hack provides an incredibly compact and easily concealable signaling device. Studies show that a whistle can be heard up to ten times further than the human voice, making it an indispensable tool for emergency preparedness.
- **The Simplicity of Sound:** Firstly, retrieve a candy wrapper – the sturdier, crinkly type works best. Secondly, pull a clean edge of the wrapper taut between your thumbs and forefingers. Thirdly, blow a focused stream of air across the tight edge.
- **Practice Makes Perfect:** Achieving a clear, loud sound might take a few tries, but once mastered, you’ll have a reliable way to attract attention without expending much energy. This miniature whistle takes up virtually no space, making it perfect for stashing in any survival kit or even a small pocket. Remember the international distress signal: three short blasts, three long blasts, three short blasts.
3. The Soda Bottle Rainwater Collector: Securing Vital Hydration
Water is the most critical element for survival; a person can only survive an average of three days without it. Efficiently collecting rainwater is a fundamental outdoor survival skill. This innovative use of a common soda bottle maximizes its surface area for water collection, significantly boosting your chances of staying hydrated. Data from various wilderness expeditions emphasize that water scarcity is a leading cause of incapacitation.
- **Modifying the Bottle:** Begin by cutting off either the top or bottom of a plastic soda bottle, depending on how you intend to place it. If you’ll be setting it on a flat surface, remove the top. If you plan to secure it in soft ground, remove the bottom.
- **Creating Collection “Branches”:** About two inches up from the cut edge, slice vertical strips into the bottle’s side, stopping just before the bottle’s original neck or base. Secondly, carefully bend these strips outward. Plastic tends to spring back, so apply a small amount of heat from a lighter to the bend point for just a second. This gentle heating will cause the plastic to “set,” maintaining its outward-curved shape, creating effective funnels for collecting water.
- **Placement and Purification:** Position your modified bottle in an open area to catch falling rain. While this hack excels at collection, always purify any collected water before drinking to eliminate pathogens. Boiling or using purification tablets are effective methods to ensure safety.
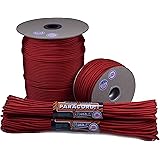
4. Paracord Fishing Lure: Sustenance in the Wild
Finding food in a survival situation can be challenging, especially without specialized gear. This clever hack transforms a piece of versatile paracord into an effective fishing lure, offering a chance at a meal. Paracord is an essential item in any emergency pack, with a breaking strength often exceeding 500 pounds, making it incredibly useful for a multitude of tasks beyond fishing.
- **Preparing the Paracord:** First, cut a piece of paracord approximately an inch and a half long. Next, pull the inner strands of the paracord out slightly, extending about half an inch beyond the main body. Trim the outer sheath so that only about three-quarters to one inch of the paracord remains, with the inner strands exposed at one end.
- **Attaching to the Hook:** Carefully feed the paracord onto a fishhook from the end without the exposed strands. The hook should emerge from the side of the paracord, allowing the frilled strands to hang freely. Thirdly, use a lighter to gently fuse the cut end where the paracord meets the hook, securing it in place.
- **Fraying for Attraction:** Finally, fray out both the main body of the paracord and the exposed inner strands. This creates a soft, flowing movement in the water, mimicking natural prey and attracting fish. Attach your lure to a fishing line and cast away to try and catch dinner.
5. DIY Toilet Paper Dispenser: Maintaining Hygiene and Comfort
Proper hygiene is often overlooked in survival scenarios but is crucial for morale and preventing illness. Wet, unusable toilet paper is a common grievance among outdoor enthusiasts. This simple hack ensures your toilet paper stays dry and accessible, making a significant difference in comfort and health during outdoor adventures.
- **Repurposing a Coffee Container:** Acquire an empty plastic coffee container with a secure lid. First, cut a horizontal slit in the side of the container, wide enough for your toilet paper to dispense freely. Secondly, cut a small hole in the center of both the lid and the bottom of the container.
- **Assembly and Deployment:** Remove the lid, insert a full roll of toilet paper, and feed the loose end through the side slit. Replace the lid securely. Next, thread a length of rope through the holes in the lid, the center of the toilet paper roll, and the bottom of the container.
- **Benefits of Dryness:** This design keeps the toilet paper protected from rain, dew, and splashes. The rope allows you to hang the dispenser conveniently from a tree branch or tent pole, keeping it off the damp ground. Maintaining personal hygiene can prevent skin irritations and infections, which are often exacerbated in wilderness settings.
6. Rope-on-Rope Cutting: When Tools Fail in the Wilderness
It’s easy to lose or break a knife in the wilderness, leaving you without a crucial cutting tool. This ingenious method demonstrates how you can cut rope using nothing but another piece of rope, relying on friction and heat. This technique showcases true resourcefulness, a cornerstone of wilderness survival.
- **Preparation and Placement:** Firstly, measure the desired length of the rope you need to cut. Secondly, tie two secure knots on either side of the intended cut point; these knots will help prevent the rope from fraying excessively after it’s cut.
- **The Sawing Action:** Place the rope you want to cut on the ground and step on both sides, just outside your knots, to hold it taut. Next, take another piece of rope and run it underneath the section you wish to cut. Thirdly, grab both ends of the sawing rope and begin a vigorous back-and-forth motion, creating friction against the taut rope.
- **Friction and Heat:** The constant friction generates heat, which will eventually melt and sever the rope. This method, while slower than using a knife, is remarkably effective and a valuable trick to know when your primary tools are unavailable. Be mindful of potential burns from the heated rope.
7. Lip Balm as a Water & Wind Sealant: Protecting Your Gear Temporarily
Leaky boots or a drafty zipper can quickly make a bad situation worse, leading to discomfort, hypothermia, or frostbite. Lip balm, often carried for personal care, contains oils and waxes that can act as a temporary sealant against the elements. This hack offers a quick, temporary fix for compromised gear, underscoring the versatility of everyday items in an emergency situation.
- **Targeting Leaks:** One common vulnerability in hiking boots is around the seams. Apply a generous layer of lip balm along the stitching. Gently warm the applied lip balm with a lighter; this helps the oils penetrate the material, creating a more effective water-resistant barrier.
- **Zipper Protection:** Cold air and moisture can also seep through coat zippers. Rubbing lip balm along the zipper teeth and fabric can form a temporary barrier, reducing drafts and minor leaks.
- **Understanding Limitations:** While not a permanent solution, this trick can provide critical temporary relief, preventing further saturation and maintaining warmth. In a choice between chapped lips and hypothermia, sacrificing some lip balm for your gear might be the smarter move.
8. The Lip Balm Lamp: Emergency Light and Fire Starter
Darkness in the wilderness can be daunting and dangerous, making tasks like setting up camp or finding resources incredibly difficult. Lip balm, composed mostly of flammable oils, can be ingeniously repurposed as a temporary source of light or a fire starter. This simple lamp can burn for an impressive duration, providing much-needed illumination.
- **Creating the Wick:** First, find a small, heat-resistant container like a metal cup, a rock with a divot, or even a folded piece of aluminum foil. Next, create a wick from a piece of cotton cloth or string; roughly an inch or two long will suffice.
- **Fueling the Lamp:** Fully extend a stick of lip balm and remove it from its plastic container. Place the solid stick of oil into your chosen container. Insert one end of the wick into the lip balm, ensuring it’s submerged, and leave the other end exposed to light.
- **Extended Illumination:** Light the exposed wick. As the flame heats the lip balm, it will melt, effectively fueling the flame and allowing it to burn for a significant period. A single tube of lip balm contains enough oil to burn for up to 20 minutes, offering valuable light in a dark environment or a sustained flame to ignite larger tinder for a campfire. This hack epitomizes DIY survival.
9. Shoelace Firestarter Kit: Always Be Ready to Ignite
Fire provides warmth, protection, a means to cook, and purifies water – making it one of the most vital survival elements. Carrying a dedicated fire starter is crucial, but having a backup integrated into your gear is even better. This hack ensures you always have a ferrocerium rod and striker readily available, minimizing the chance of being without this essential tool.
- **Disassembling the Rod:** Start with a ferrocerium rod and its striker. Carefully separate the rod from its magnesium block (if attached). Clean off any epoxy or residue from the rod. Secondly, use a hacksaw to cut the rod in half, creating two smaller, more manageable pieces. The sparks generated during this process are quite spectacular!
- **Integrating into Paracord:** Replace your standard shoelaces with paracord. Cut a length of paracord equal to your shoelace, then fuse one end with a lighter. Pull back the outer sheath of the paracord a few inches and cut some of the inner strands, leaving a hollow section slightly longer than your ferrocerium rod half.
- **Secure Storage:** Compress the hollow section of the paracord to expand its width, then carefully insert one half of the ferrocerium rod. Once the rod is fully inside, fuse the end of the paracord to seal it. Repeat for the other shoelace if desired, or store both halves in one. For the striker, secure it underneath the sole of your boot with a small piece of duct tape. In an emergency, simply cut open the paracord to access your fire starter. This is a prime example of proactive prepper skills.
10. 9-Volt Phone Charger: Reconnecting in Crisis with a Battery and Key
A dead phone battery can feel like the end of the world, especially when you need to contact someone or access crucial information. While not a full charge, this clever trick can provide enough juice from a 9-volt battery to make an urgent call or send a vital message. It’s a testament to improvised power solutions for emergency situations.
- **Connecting the Power:** Firstly, plug your car phone charger (the type that converts a car’s 12V DC to USB) into your dead cellphone. Secondly, touch the protruding metal end of the car charger to the smaller (negative) terminal of a 9-volt battery.
- **Completing the Circuit:** Next, use a conductive metal object – a house key, a paperclip, or even a small coin – to connect the larger (positive) terminal of the 9-volt battery to the metal contacts on the side of the car charger’s plug. This completes the circuit, allowing a small charge to flow to your phone.
- **Temporary Power:** For hands-free charging, use electrical tape to secure the connections. This method provides a very slow trickle charge, enough for a few precious minutes of talk time or to send a text. It’s an emergency hack, not a daily charging solution, but it highlights how basic electrical principles can be applied for critical needs.
The beauty of these survival hacks lies in their simplicity and the creative reuse of common items. While we all hope to never face a true survival scenario, knowing these emergency preparedness tips can instill confidence and empower you to handle unexpected challenges. Practicing these skills in a safe environment is highly recommended, as familiarity will be your greatest asset under pressure. Remember, preparation isn’t about fear; it’s about fostering self-reliance and ensuring you’re ready for whatever life—or the wilderness—throws your way.
Doomsday Debrief: Your Survival Questions Answered
What are survival hacks?
Survival hacks are clever, simple solutions that use common, everyday items to help you in emergency or wilderness situations. They aim to provide essential aid when specialized gear isn’t available.
Why is it important to learn basic survival skills?
Learning basic survival skills is important because emergencies can strike unexpectedly, whether you’re camping, hiking, or just in an unforeseen situation. These skills boost your self-reliance and help turn a crisis into a manageable challenge.
What kind of things can survival hacks help with?
Survival hacks can help you with critical needs like navigating if you’re lost, signaling for help, collecting drinking water, starting a fire, or even providing a temporary light source. They use simple items for big impacts.
Can I use regular household items for survival hacks?
Yes, many survival hacks focus on repurposing common items you might already have, such as candy wrappers, soda bottles, or lip balm. This creative reuse helps you address essential needs with minimal resources.