Statistically, unforeseen emergencies can impact millions globally each year. Whether natural disasters or unexpected outdoor challenges, personal preparedness makes a critical difference. Building your own DIY survival gear is a powerful step towards true self-reliance. As explored in the video above, crafting essential tools provides unmatched confidence and customization.
This approach moves beyond simply buying equipment. It cultivates invaluable skills and a deep understanding of your tools. You save money, certainly, but you also gain the satisfaction of self-sufficiency. Let’s delve deeper into making your own survival essentials, from basic fire starters to advanced filtration systems.
Crafting Your Core Survival Essentials
Every effective survival kit starts with foundational components. These are the items that address immediate threats like cold, thirst, and injury. Building these yourself enhances your connection to your gear.
Igniting Hope: DIY Fire Starters
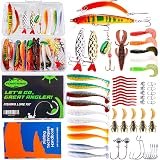
Fire is a fundamental element for survival in the wilderness. It provides warmth, cooks food, and purifies water. A reliable fire starter is therefore non-negotiable for any adventurer.
The video highlighted petroleum jelly-soaked cotton balls. This simple yet effective method creates an extended flame. Petroleum jelly acts as a fuel source, burning slowly and consistently.
To make them, melt a small amount of petroleum jelly. Submerge ordinary cotton balls completely in the warm jelly. Ensure each fiber is thoroughly saturated with the mixture.
Store these prepared cotton balls in a small, airtight container. This keeps them dry and ready for immediate use. A single spark is often all it takes to ignite this potent tinder.
Consider other natural tinder alongside these. Birch bark, dried grasses, or shredded inner bark can also catch a spark easily. Combine manufactured and natural solutions for optimal readiness.
Securing Life: Water Purification Methods
Water is more critical than food in a short-term survival scenario. Dehydration can incapacitate a person very quickly. Access to potable water is absolutely paramount.
Water purification tablets are an excellent lightweight solution. They utilize chemical agents like iodine or chlorine dioxide. These effectively neutralize a wide spectrum of harmful microbes.
Always read package instructions carefully before use. Different brands have varying wait times and dosages. Ingesting untreated water poses severe health risks, so precision is key.
Boiling is another highly effective purification method. Bringing water to a rolling boil for one minute kills most pathogens. This classic technique has saved countless lives through history.
Combining methods offers the highest safety margin. Filter murky water first, then boil or treat it. This multi-stage approach ensures your water is as safe as possible to drink.
Mending Ailments: Your DIY First-Aid Kit
Accidents and injuries are common companions in the outdoors. A well-stocked first-aid kit can mitigate minor issues before they become major problems. It’s truly your wilderness best friend.
Your basic kit needs antiseptic wipes to clean wounds. Include various bandage sizes for cuts and abrasions. Pain relievers and antihistamines address common discomforts and allergic reactions.
Remember any personal prescription medications too. Always keep these accessible and protected from the elements. A sturdy, waterproof bag is ideal for storing all medical supplies securely.
However, a kit is merely a collection of tools. Your knowledge of how to use them is the true asset. Knowing basic wound care, splinting techniques, and treating burns is invaluable.
Consider taking a certified wilderness first-aid course. Such training provides practical skills for remote situations. It empowers you to act decisively when medical help is distant.
The Pocket Workshop: Essential Multi-Tool Selection
A high-quality multi-tool acts like a miniature toolbox in your hand. It offers versatile functionality in a compact form. This single item replaces many bulkier, single-purpose tools.
Look for a model with a robust knife blade for cutting tasks. A saw attachment can handle small branches for shelter or firewood. Pliers are indispensable for gripping, bending, or extracting.
Screwdrivers, both flathead and Phillips, are useful for quick repairs. A can opener, while seemingly trivial, becomes vital for packaged food. These tools combine to create incredible utility.
Opt for durable materials like high-grade stainless steel. A comfortable, ergonomic grip prevents hand fatigue during prolonged use. This tool is an extension of your resourcefulness in the wild.
Think of it as the ultimate problem-solver for unexpected situations. From shelter construction to equipment repair, a good multi-tool saves the day. Choose one that feels reliable and sturdy in your grasp.
Building Your Haven: DIY Survival Shelters
Shelter provides crucial protection from the elements, both physically and psychologically. It offers respite from wind, rain, snow, and sun. A well-constructed shelter can prevent hypothermia or heatstroke.
The goal is practicality and effectiveness, not elaborate design. The lean-to is a prime example of a simple, functional shelter. It uses readily available natural materials to provide immediate relief.
Constructing a Basic Lean-To
First, identify a sturdy, natural support structure. This could be a large fallen log or a robust tree limb. An existing rock face or dense thicket can also serve as a strong anchor.
Next, gather long, straight branches for the roof framework. These should be strong enough to bear the weight of covering materials. Aim for branches approximately one meter longer than your desired roof slope.
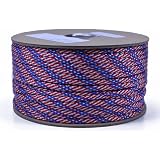
Lean these branches against your support at an angle. This creates a sloping roof to shed precipitation effectively. Secure them firmly using paracord, vines, or interwoven smaller branches.
Now, add your insulation and waterproofing layers. Begin layering natural materials from the ground up, overlapping like shingles. Use large leaves, ferns, moss, or strips of bark.
The denser the layers, the better the insulation and waterproofing. Consider an emergency blanket as an internal radiant barrier. This reflects body heat back into your shelter, enhancing warmth.
Choose your shelter site wisely, as the video emphasized. Select elevated ground to avoid pooling water. Ensure it’s away from unstable slopes or dead trees that could fall.
Your shelter also offers a psychological refuge from the unknown. It represents a measure of control in an unpredictable environment. The act of building it further reinforces your self-reliance.
Advanced Ingenuity: Mastering DIY Survival Tools
Once you grasp the basics, expand your capabilities with advanced projects. These items often require more time and specialized knowledge. They are particularly valuable for longer-term survival scenarios.
Sustainable Hydration: The DIY Water Filter
While purification tablets work for short durations, a DIY filter offers sustainable water treatment. This system physically removes larger particles and some biological contaminants. It’s a key component for long-term water safety.
Begin with a plastic bottle, cutting off the bottom for easy access. Puncture small holes in the cap to allow filtered water to drip through. This bottle forms the housing for your filter layers.
Layer materials inside the bottle in a specific order. Start with a piece of cloth or fine mesh at the bottom. This prevents finer particles from escaping through the cap.
Above the cloth, add a layer of charcoal, preferably from hardwood fires. Charcoal is highly porous and can absorb impurities, odors, and some toxins. It’s a natural chemical filter.
Next, add a layer of fine sand, which acts as a physical barrier. It traps smaller sediment and suspended particles. Ensure the sand is clean and free of excessive organic matter.
Top this with a layer of coarser gravel or small stones. This prevents the sand layer from being disturbed. It also filters out larger debris from the incoming water.
Pour untreated water slowly into the top of this assembly. Gravity will pull the water through each layer, cleaning it progressively. The collected water at the bottom will be visibly clearer.
Crucially, this filtered water is NOT safe to drink directly. It must still be boiled or treated with purification tablets. The filter removes particulate matter, not all harmful microbes.
Cooking with Sunlight: The DIY Solar Oven
Harnessing the sun’s energy for cooking is ingenious and fuel-efficient. A solar oven allows you to prepare food without fire. This is especially useful in dry conditions where open flames pose a risk.
You can construct a simple solar oven from cardboard boxes and aluminum foil. Line the interior of a cardboard box with foil, shiny side facing inward. This creates a highly reflective cooking chamber.
Design a lid with a transparent cover, like plastic wrap. This traps solar radiation inside the box, creating a greenhouse effect. A flap on the lid, also lined with foil, directs more sunlight inward.
Angle the entire assembly towards the sun for maximum efficiency. Place your food in a dark, oven-safe pot inside the box. Dark pots absorb heat better than light-colored ones.
The oven slowly heats up, gently cooking your food over several hours. It’s like a slow cooker, using only natural solar power. This method conserves precious fuel and reduces environmental impact.
Shaping Survival: Crafting a Natural Knife
A knife is perhaps the most fundamental survival tool, a symbol of self-reliance. It’s used for countless tasks, from preparing food to cutting cordage to making other tools. In an emergency, you can craft one from nature.
Search for suitable hard, brittle rocks like flint, chert, or obsidian. These materials fracture predictably with sharp edges. Learning to “knap” or chip away at the stone is an ancient art.
Use a smaller, harder hammerstone to strike precise blows. This gradually removes flakes, revealing razor-sharp edges. The process demands immense patience and careful technique to avoid injury.
Once a usable blade is formed, create a secure handle. This can be fashioned from a piece of wood, bone, or antler. Secure the blade to the handle using natural cordage, pine resin, or sinew.
A well-crafted stone knife can perform many tasks of a modern blade. It speaks to human ingenuity and adaptability in dire circumstances. Always prioritize safety when working with sharp natural materials.
Embracing the creation of your own DIY survival gear goes beyond mere practicality. It’s a journey into resourcefulness and self-empowerment. This hands-on experience strengthens your mindset and confidence. The knowledge gained from crafting your own tools is truly invaluable when facing the unexpected.
Forging Ahead: Your Survival Gear Q&A Toolkit
What is DIY survival gear?
DIY survival gear refers to essential tools and equipment that you craft yourself using available materials. It helps you prepare for emergencies and increases your self-reliance.
Why should I consider making my own survival gear?
Crafting your own survival gear helps you gain a deeper understanding of your tools, saves money, and develops valuable self-reliance skills. It also boosts your confidence in emergencies.
How can I make a simple fire starter?
A simple and effective fire starter can be made by thoroughly saturating cotton balls with melted petroleum jelly. Store them in an airtight container to keep them dry and ready to ignite with a spark.
What are the easiest ways to make water safe to drink in an emergency?
The easiest ways to purify water are by using chemical purification tablets or by boiling it for one minute. Always read tablet instructions and ensure water is at a rolling boil.
What should I include in a basic DIY first-aid kit?
Your basic DIY first-aid kit should contain antiseptic wipes, various bandage sizes for cuts, pain relievers, and any necessary personal prescription medications. Keep all items in a waterproof bag.